

Update 13 March, 2017: FSDL has been modified with the release of Frogans Player for developers alpha (v1.4.1), in particular with modifications to the values of the “visible” attribute in the <layer> element. The contents of this post and the downloadable resources have been updated accordingly.
Update 30 Nov, 2015: The “align” attribute has changed for the latest version of Frogans Player for developers alpha (v0.2.1). The contents of this post and the downloadable resources have been updated accordingly. Click here for more info.
The previous post covered the bare-bones basics of creating a Frogans slide. This one will cover the bare-bones basics of navigation by means of buttons. Once again, don’t hesitate to refer to the resources at https://www.frogans.org/en/resources/fsdl/access.html.
Frogans sites navigate much by Web sites do. Buttons can be presented on Frogans slides to navigate to other slides in the same site, to other Frogans sites, to any Web page (this functionality is still under development) or to send an email in your default email client application (this functionality is also still under development).
Starting out
We’re going to work from the slide from the previous post “Creating a Frogans slide and viewing it.” You can download the source here. Create a new folder in your Frogans Player’s “test” folder. You can name it “buttons01,” for instance. Copy the source files from the previous post into this one.
About FSDL buttons
A button is created in FSDL by placing two or more layers as children of a <button>, for example:
<button … >
<layer … />
<layer … />
</button … >
For a button to work, at least two layers are needed: One that is visible when the button is NOT selected (e.g., when the mouse is away) and one that is visible ONLY when the button is in selected (e.g., when the mouse hovers over the button, like a rollover). This way, the button can change appearance, like a rollover, when it is in focus.
Its very important for each button have two visibly distinct states. For one thing, on desktop computers, the mouse does not change appearance when it passes over a button. Moreover, on touchscreen devices, which traditionally don’t support rollovers, Frogans Player will use an altogether different method for selecting buttons. This method uses a kind of virtual trackpad adjacent to the slide. In both cases, a rollover effect is the only way for a user to know if where and when to click on a button.
[Check out this video showing a demo of how Frogans Player works on desktop and touchscreen devices. You can see how the “pad” works around the 20 minute mark.]
Let’s do navigation
Let’s start off by importing an image that can serve for both states of the button. We can use effects in FSDL to make each state visually distinctive. Here’s an image file (“button_a.png”) that should do the trick:

Download this image file and place it in the same folder as your FSDL file and other resources. Be sure to create a reference to the image file and then create a resource:
<file fileid='buttonA_f' nature='static' name='/button_a.png' />

<resimage fileref='buttonA_f' resid='buttonA_r' size='64,64' />
We’re going to create a button that goes to another slide in the same Frogans site. So we need to also create a reference to the FSDL file that the button is going to navigate to:
<file fileid='pooch2_s' nature='static' name='/pooch2.fsdl' />
[Alternatively, you can have the button reload the same slide by referring to its FSDL file. At any rate, a button has to go somewhere or else Frogans Player will give you a parsing error.]
Now, you can present the button on the slide with this code:
<button buttonid='button1' goto='slide' fileref='pooch2_s' >

<layer resref='buttonA_r' layerid='buttonAaway_l' leapout='lead' pos='520,270' align='left-top' combine='clip' visible='not-selected' opacity='65' />

<layer resref='buttonA_r' layerid='buttonAover_l' leapout='lead' pos='530,270' align='left-top' combine='clip' visible='selected' opacity='100' />

</button>
The button, in its unfocused state, should look like this on your slide:
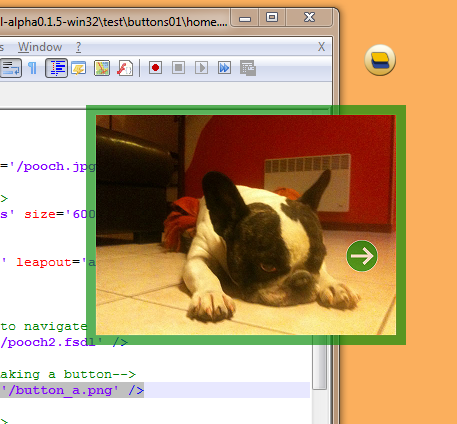
Notice that the two layers in the <button> refer back to the same resource. The difference between the two <layer> elements is in the placement (the “pos” attribute) and the opacity. By making the first, unfocused layer only 65% opaque, and by placing the second, rollover layer at bit to the right, we have enough of a visual difference to catch the user’s eye and to make it obvious that this is a button.
Click here for an archive of this and a second slide. Together, they make a real Frogans site.
Click here for a version of the same site that uses some more advanced features for making the “vignette” presentation more entertaining. I’ll get to the techniques behind that in another post.
Leave a Reply